
Now that I've had a few guinea pigs try this one out, I'm ready to share my knitted headband pattern. I made this in a single afternoon, and it really is easy.
Skills required: Garter stitch (just knit, no purl!), increasing and decreasing, and I-cord.
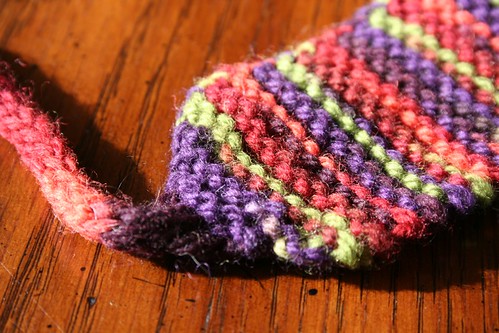
Materials required: Any yarn of your choice (but think soft -- this is going to be against your skin), and two double-pointed needles in an appropriate size for your yarn. The photographed headband was made with worsted-weight yarn on size 6 needles.
To begin, cast on 3 stitches, using any cast-on method. Then make an I-cord approximately 6 to 7 inches long.
Now start to knit these stitches back-and-forth in regular garter stitch (as if you were using regular needles). Knit across all three stitches once, then turn the work. With each succeeding row, increase one stitch at the beginning of each row. You can use any increase you like (except a yarn-over); I knitted into the front and back of the stitch. So with each row, you will be gaining one stitch at the beginning. This will begin to form a triangle coming out from your I-cord.
Whenever your piece has reached the desired width of your headband, stop increasing and continue just knitting back and forth in garter stitch (knit each row). (My headband is 12 stitches across and 2 inches wide, but obviously this will vary with your gauge.)
You will want this main section of the headband to be long enough to reach from behind one ear to behind the other, so the easiest thing is to hold the work up to your own head. (But for reference, my headband is 15 inches long, not including the I-cord or triangular-increase sections.)
When you've reached the desired length for the main section of headband (the part that will show), begin to decrease the same way you increased on the other side. Thus, decrease by one stitch at the beginning of each row. I just knit two together on the first stitch each time, and it looks fine. Keep decreasing by one stitch each row until just three stitches remain.
Now once again knit these three stitches in an I-cord, the same length as the I-cord on the other side. When you've reached the desired length, bind off all stitches.
The nice thing about this headband is that it's stretchy, and because you tie it in the back at exactly the tension you want, it is super comfy.
This is a great project for an advanced beginner, because you can try out a few new skills on a small-scale project that doesn't take too long to complete. It's also a great way to show off some self-striping yarn, as in the photo. Enjoy!
can you make a video on how to make this headband?
ReplyDeletebecause i really like your headband and i don't understand how to make it. thanks
Thank you very much! I was looking for exactly this -- a headband with ties -- and was able to "whip" it up this afternoon. Had to teach myself the "I cord," but that's one new stitch under my belt. So thank you so much for a real treat! I'm sure I'll make quite a few for gifts!
ReplyDeleteThank you! I had to learn ho to do an i-cord too (utube), but I really enjoyed making this pattern.
ReplyDeleteits very useful for me...thanks for sharing this tutorial with us
ReplyDelete